
Procedure for Assembling a Trampoline in Kenya
Trampolines are gaining popularity in Kenya for both commercial and domestic use. This then increases the demand for people to learn the procedure for assembling a trampoline. Below is a six-step by step procedure for assembling a trampoline at home. In case you missed the article on how to disassemble a trampoline at home, click here to find out how.
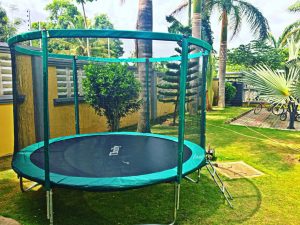
Contact Us for a Brand New Heavy Duty Trampoline;
Step 1: Preparation and area setup.
Trampolines are best installed on a level ground and one that has no rocks or anything that can destroy the trampoline especially while bouncing. I’m sure by this time you have already decided the size of the trampoline you are getting depending on the amount of space you have on your compound.
Step 2: Remove and lay all the trampoline parts on the ground.
The trampoline is usually delivered in one box that has the following parts:
- Galvanized steel frame
- Trampoline legs
- T-section joints
- Enclosure poles (Pole sponge and pole sleeves)
- Safety net
- Ladder
- Spring cover pad (Enclosure strings)
- Jumping mat
- Pole caps or connectors (14 ft trampolines use pole caps while 10 ft trampolines have connectors)
- Spring tool
- Spanner
- Screws
- Alanki
Step 3: Setup the Trampoline frame step by step.
Place the trampoline steel frame and the T joints, they should form a circular shape. Ensure you have the same number of steel frames and T joints. The purpose of the T joints is to provide a connection to the trampoline legs. The next part is joining the steel frames together to form a circular shape. Once the perfect circle is formed, the trampoline is starting to take shape and you can now start seeing where the jumping mat and the legs will go.
The next step is adding the legs, as stated earlier, the T joints act as connectors for the legs. Start by adding one dual leg using the screw and a screwdriver then move to the next leg once done. Kindly ask for assistance when adding the legs.
Ensure the legs are screwed tightly to avoid accidents.
Step 4: Add the trampoline mats and springs
The trampoline mat and springs are the most important parts of the trampoline so be certain of the following things before you start setting up:
- The trampoline jumping mat has no tears or holes.
- The springs are unused, they should brand new.
- You have the spring tool.
If the following things are in check, you can start attaching the trampoline mat and springs.
Using a spring tool, attach one spring to one side of the trampoline, skip 4 unhooked spring points then attach the next spring. Follow this process until you get to the point that you began from. After that, attach the rest of the springs. This makes it easier to attach springs to all sides of the trampoline without using so much strength on one side of the trampoline. It also makes the trampoline mat balanced and the mat will not be damaged on one side.
Add the spring cover pad by tying the strings to the frame securely. This provides safety for the children while playing.
Step 5: Build the trampoline enclosure
The trampoline support fixtures can be added before or after the trampoline padding. It’s up to you. We will add them at this point. Most modern trampolines have the enclosure support brackets fixed to the trampoline legs which provide extra support and stability.
Attach the first support pole to the trampoline fixture. Line it up correctly and secure the screw into the hole. Make sure it’s tight and feels secure. After securing the bottom of the enclosure poles to the trampoline legs, next, we build up the trampoline enclosure poles to full height. They should slot together and secure quite easily.
Step 6: Add the safety net to the trampoline.
The purpose of a safety net is to ensure that the child doesn’t bounce off the trampoline while playing.
Here there are the steel rods and the connectors. At the top of the safety net, there are some spaces where the steel rods and the connectors are to be inserted. Insert the steel rod on one side of the net and it should come out on the other side where you should insert one of the connectors. The purpose of the connectors is to attach all the rods together, connect the net to the trampoline poles and, in the end, form a perfect circular shape.
Finish this process by securing the net with hooks that easily hook to the springs. Ensure you hook all of them to provide safety.
Step 6: Attach the trampoline ladder
The trampoline ladder provides easy access to the trampoline for the children.
This could be the easiest part of the trampoline assembly process, all you need to do while attaching the ladder is to place the ladder adjacent to the trampoline zip the turn the handles to securely hook to the net.
For more enquiries, brand-new heavy-duty trampoline purchases and repairs, trampoline accessories & trampoline replacement parts in Nairobi Kenya contact 0722724893. You can also visit the Frugal Innovations website & www.thriftyent.com
The sale of trampoline in Kenya is growing rapidly due to the increasing number of the middle-class population. The need to know the ABCs of trampoline maintenance and care is paramount to ensure the safety of trampoline users
Below are some useful tips on trampoline maintenance and how to care for your trampoline:
- The initial step towards proper care and maintenance of a trampoline in Kenya starts the very first day that you install your trampoline. Placing your trampoline on safe ground will significantly reduce your chances of needing to repair and trampoline maintenance .
- Ensure that no structures are under your trampoline, no matter how small
- If the trampoline is positioned on an abrasive surface like concrete, it is recommended you put some rubber matting under the legs. This will stop the noise of the rubbing and wearing the metal through
- Enlightening the kids on the safe and appropriate use before they get on, is a proactive strategy in care and maintenance of trampoline in Nairobi and other towns within Kenya. In some instances, we have had kids damage their new trampoline mat within days by putting bikes, diggers, sparklers, and even using knives on their trampoline with consequent holes and tears occurring.
- Trampoline frame padding for example, is designed to break falls and to save heads and limbs meeting with springs or frame edges, thereby minimizing injuries. Teaching the kids about this helps them to understand that the pads aren’t an extension to the mat, rather it is a safety buffer thus avoid jumping directly on the pads
For trampoline mantenance, inspect your trampoline regularly
- This entails checking first, that the mat has no tears or holes, no matter how tiny. Unfortunately, there is no long term repair for a trampoline jumping mat, so if there is a small hole it will only get bigger
- Whenever you see damage on the mat, replace it immediately because it is a matter of safety, and tears mean reduced strength. Though this can be expensive,yet it has a direct impact on the health and safety of your children
It is also important to inspect the frames
- Frames can come loose where you only need to tighten a few screws in order to keep your trampoline in perfect shape. If there are any screws missing, ensure you replace them
- Where the frame is bent, you should take it to a specialist to decide if it can be repaired, or needs to be replaced. Bent frames also compromise the strength of your trampoline which can lead to serious accidents, never ignore them!
- Always check to see that the legs are straight at all times, as dragging or mowing under the trampoline can tilt them, thus pull them back in alignment
Checkout for missing or broken springs
- You need to replace them before the trampoline can be used, as a matter of urgency! A mat not 100% secured to a frame is very dangerous, because springs will continue to be over tensed and fly off, potentially hitting windows or the kids!
- If you have some squeakiness, or noises coming from your frame when the kids are bouncing, you can spray a bit of silicon lubricant on the joints and springs. Be cautious with the spray to avoid too much dust settling on the solution, because the parts can wear from abrasive dirt particles
Safety nets and safety padding should always be in good shape
Never ignore tears or other damage to these crucial parts, because they keep your family safe from falls, thus worth the attention.
- Because the pads are directly in front of the entrance area, they suffer more wear. Moving your padding around will help to even out the wear after 6 months. Outdoor weather tape which is readily available from good hardware stores comes in handy, when fixing a hole or tear from any misuse. This measure can help prolong the life of pads too
- Going around the trampoline pulling the “skirt” of the pads down from time to time to keep it tucked under the tension of the netting, help in keeping them securely in place
- Regularly check that the clamps of the safety net poles are in place and tight enough:-This can save you from both accidents, and damages when a user falls on the net
- Wind Anchor Kit:- For those living in a high wind zone, it is highly recommended that you secure your trampoline with a wind anchor kits
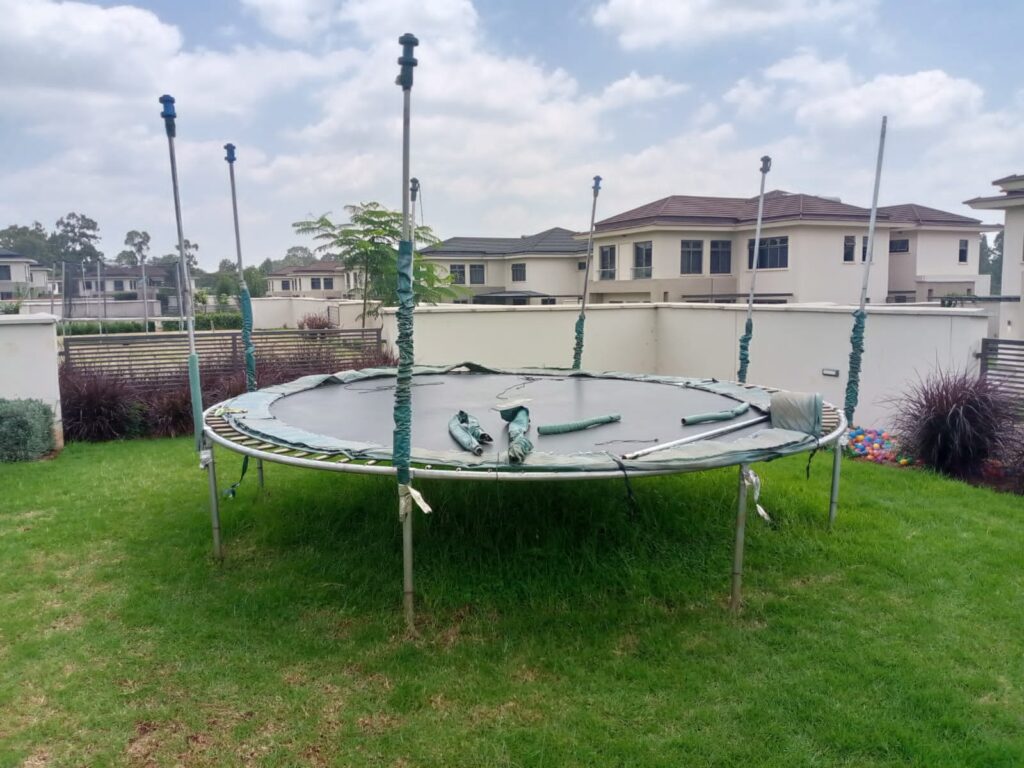
Does your trampoline look like the above picture?
It simply means that it’s time to consider buying some replacement parts. Trampolines can be dangerous if they are not properly maintained. Just as we habitually check the brakes on our children’s bikes, we also should take care of our trampoline, ensuring that it is always in a good shape.
The critical areas to consider in trampoline repairs and replacement of parts in Kenya, Uganda and Tanzania are:
The Netting
- Of all areas of a trampoline, this is the part that often fails, yet it is the most vital safety component. The netting can come apart if it is cut or ripped, it can also just rot and fall apart
- Good quality netting will last 5-10 years, therefore when ordering replacement netting, spend as much as you can-the higher the price the netting, the longer it will last
- Look for polyester netting as it is far more durable than nylon
The padding over the frame and springs
- How often you replace this component is influenced by one key consideration: – Does your enclosure netting hang inside or outside the padding? If the netting hangs outside the padding, there is no need for the padding to be in top condition, because the netting will stop the user from coming in to contact with the frame or springs ( the main reason that trampolines has surround pads)
- If the netting hangs inside the padding, as it did on most models manufactured before 2009, the padding needs to be in good condition. If the pads have fallen apart, they will not provide protection should the jumper fall on to the springs or frame
- As with replacement netting, the more you spend on padding the longer it will last. As long as the pads are a decent thickness of 20mm+ they will have plenty of cushioning property, but ensure that the outer covering material is thick too- circa 0.55m. If it’s a thin material such as PE it will crack in direct sunlight, advisable to look for good thick PVC pads
The Jump Mat
- The good news is that 99% of jump masts are made of polypropylene, as such are indestructible. The jumping mat should last at least 10 years, before they perish, however, if they get a cut or slit in them, they will need replacing. Putting a foot through a jump mat and hitting the ground can seriously injure the user
- If your mat gets a hole in it from a cigarette or ember from a bonfire, there is no cause for alarm because the cross-weave nature of a jump mat is such that the hole should not get any larger
The Frame
- The frame does not need replacing, as long as you have bought a genuine one. Most frames are made of fully galvanized steel, meaning that they will not rust or crack
- Always check the frame on a weekly basis because it is under tension, and if there is a fault in the steel, you do not want to have the frame collapsing on you
The springs
- Springs usually break either because they are not strong enough for the job (they vary in quality), or the trampoline weight limit has been exceeded
- A bit of surface rust is not a problem and if only missing a couple of springs, the quality of the bounce and safety should not be compromised in the short term
- Missing quite a few springs means that the bounce will not be as good as it should be, but more importantly, you are not spreading the load correctly across the remaining springs. This means that here is an obvious safety issue and in time, the rest of the springs will fail too
Essential Trampoline Parts Replacement in Kenya


- Where to Find the Best Trampoline for Sale in Nairobi
- Trampolines at Weddings? How Kenyan Event Planners Are Thinking Outside the Box
- How Trampolining in Nairobi Encourages Cross-Generational Involvement
- Birthday Parties on a Trampoline? Here’s How to Do It Safely and Creatively
- Are You Cleaning Your Trampoline Properly? What Nairobi Dust Does to Your Bounce